If you are a Linux power user, there is a high chance that you would have become familiar with the command line interface (CLI), as it automates many menial tasks. Having been using the i3 window manager for more than two years now, I would be lying if did not admit that I am completely used to the CLI and using GUIs have become a pain.
Anyone who taken on the task of setting up i3-wm or any other type of minimal window manager would be familiar with the task of either learning the key combinations for the application launchers, or setting up a different and more customizable app launcher.
As it is already apparent from the title of this article, I will be going over my configuration and ricing of Rofi. Before going any further, I will admit that my knowledge of preference of Rofi over Dmenu is only limited to the customizability of Rofi. This is the same aspect of Rofi that I will be exploring the majority of, in this article.
Installation:
Before configuring Rofi, we first need to install it as it is a third party app launcher. To do so, depending on which distribution of Linux you are using, it can be either installed using the apt-get packet manager in debian,
sudo apt-get install rofi
or in arch based distributions using the pacman packet manager
sudo pacman -S rofi
as well as fedora using dnf
sudo dnf install rofi
Basic Operations:
Once it is installed, it can be launched using the command
rofi -show <mode>
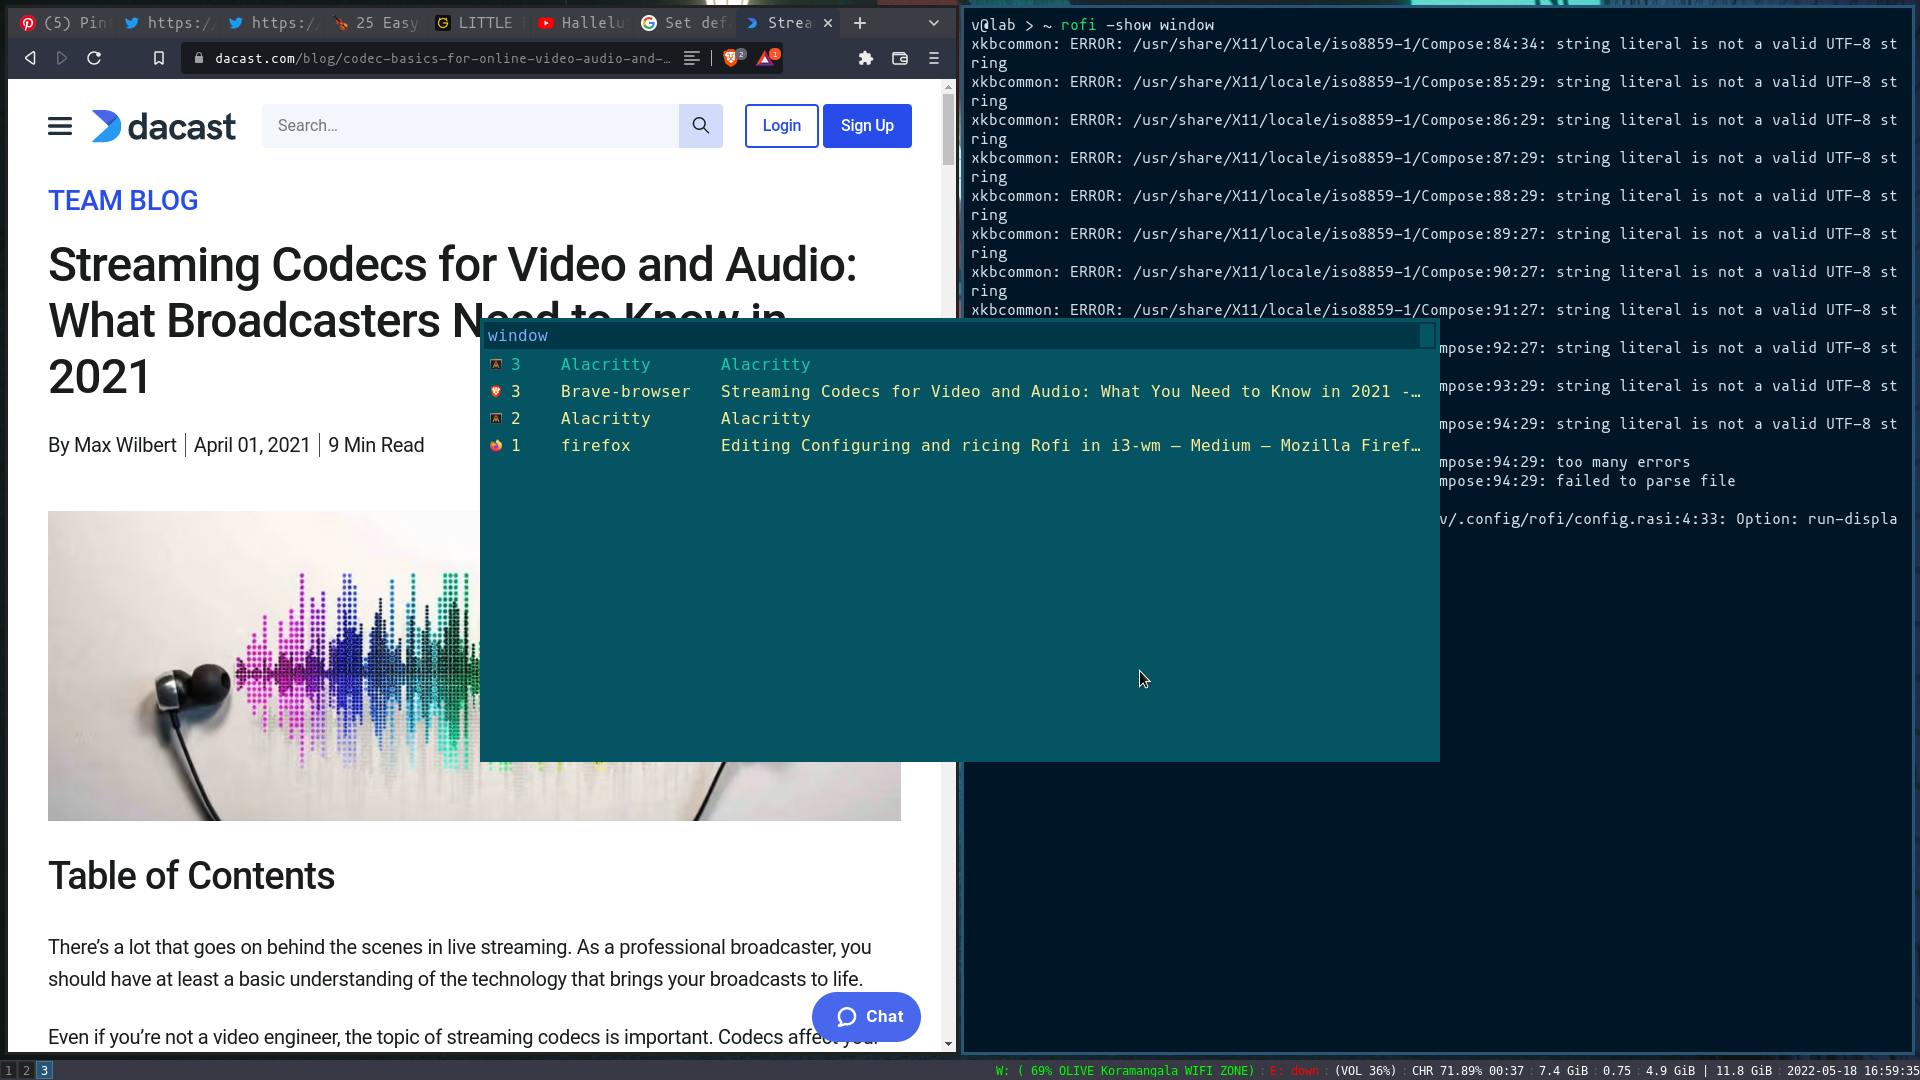
where the is an option between three modes - window, drun and run. Here window mode allows us to switch between windows
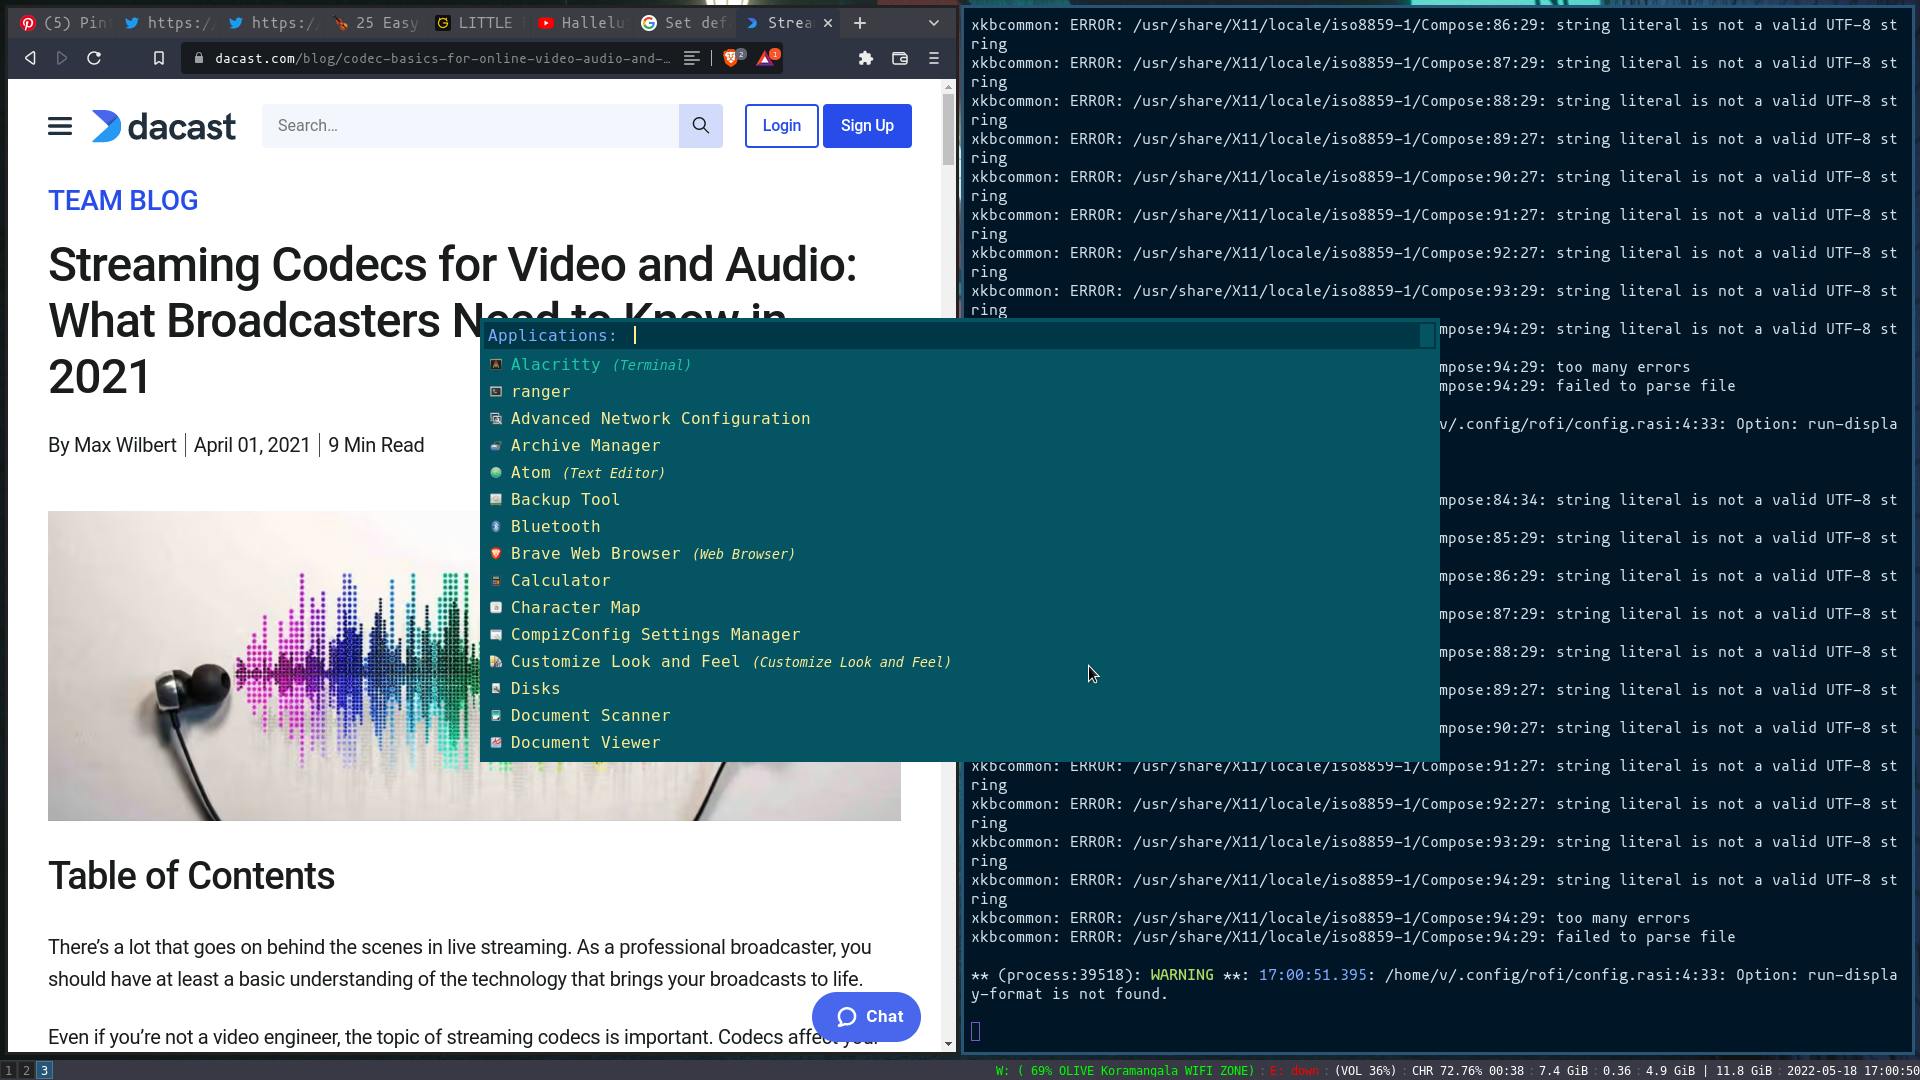
 drun gives a list of applications
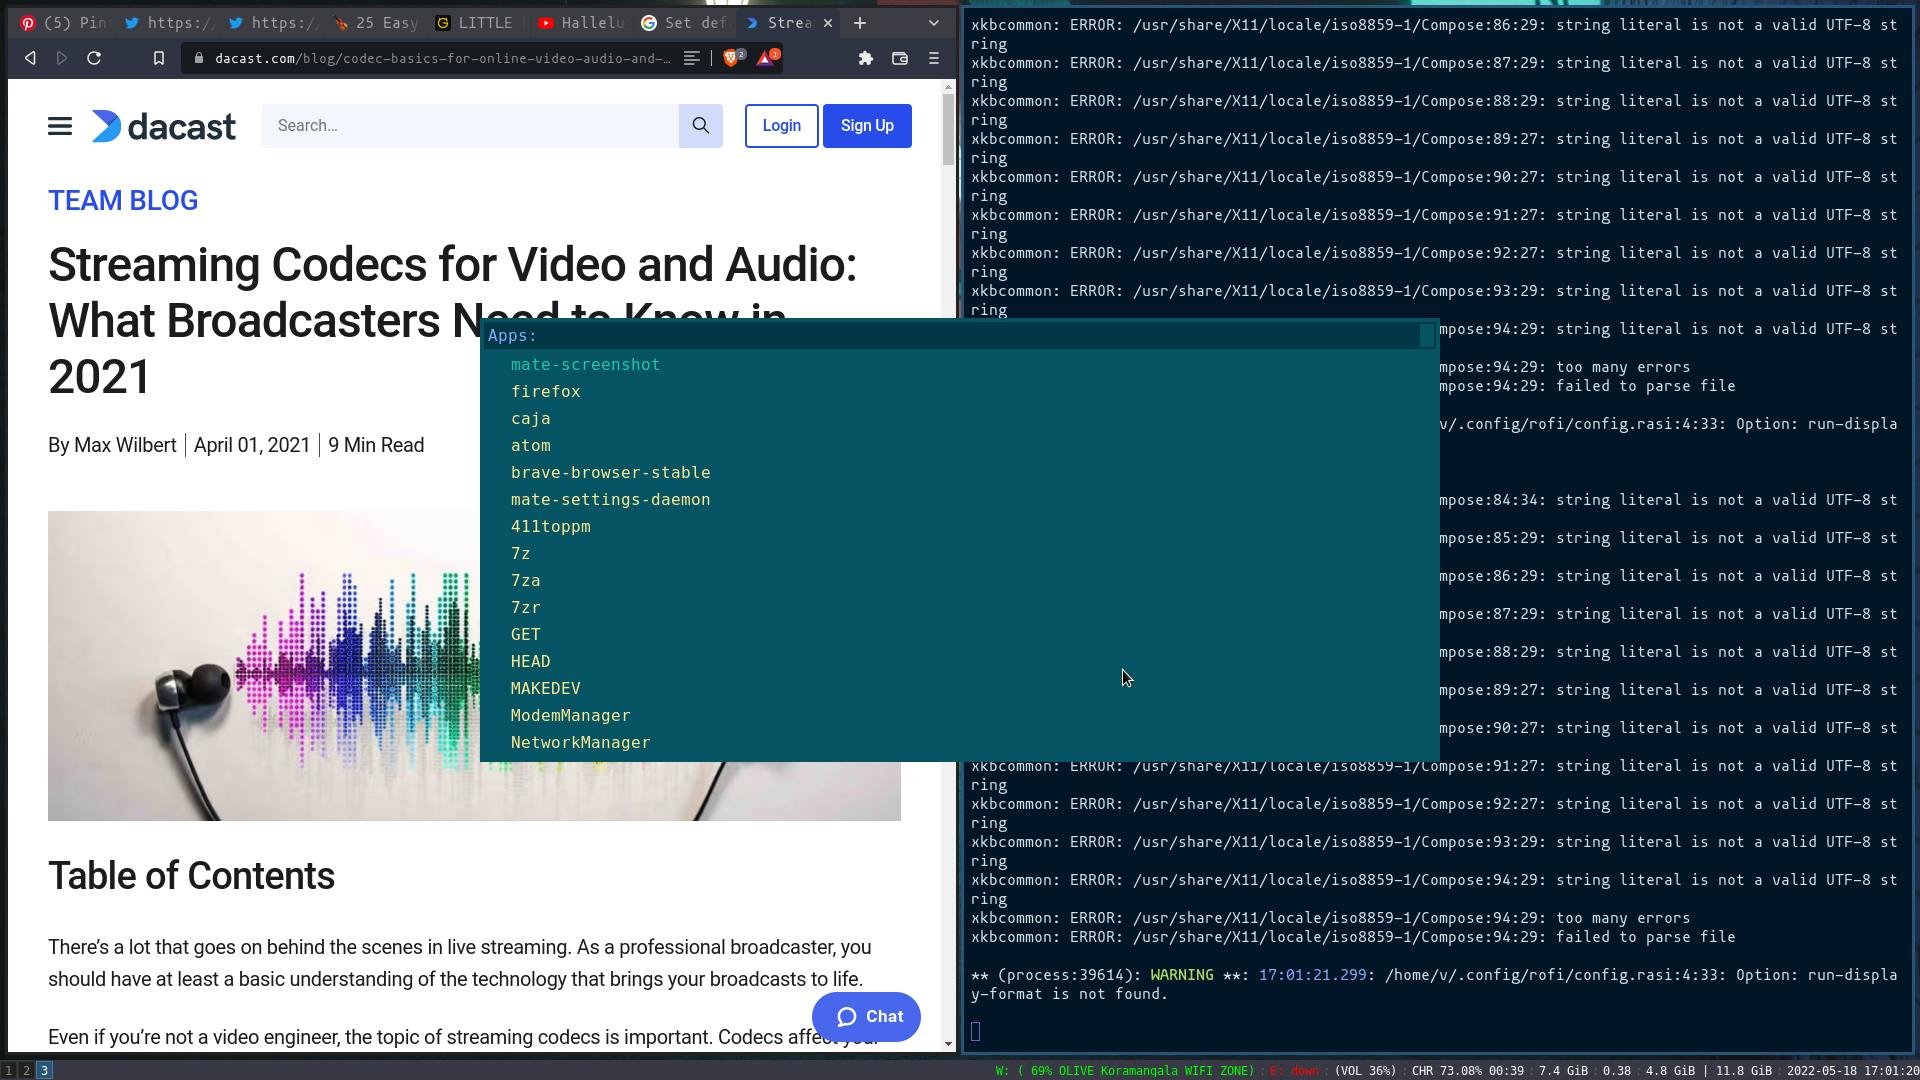
 and run gives a list of commands which can be used.
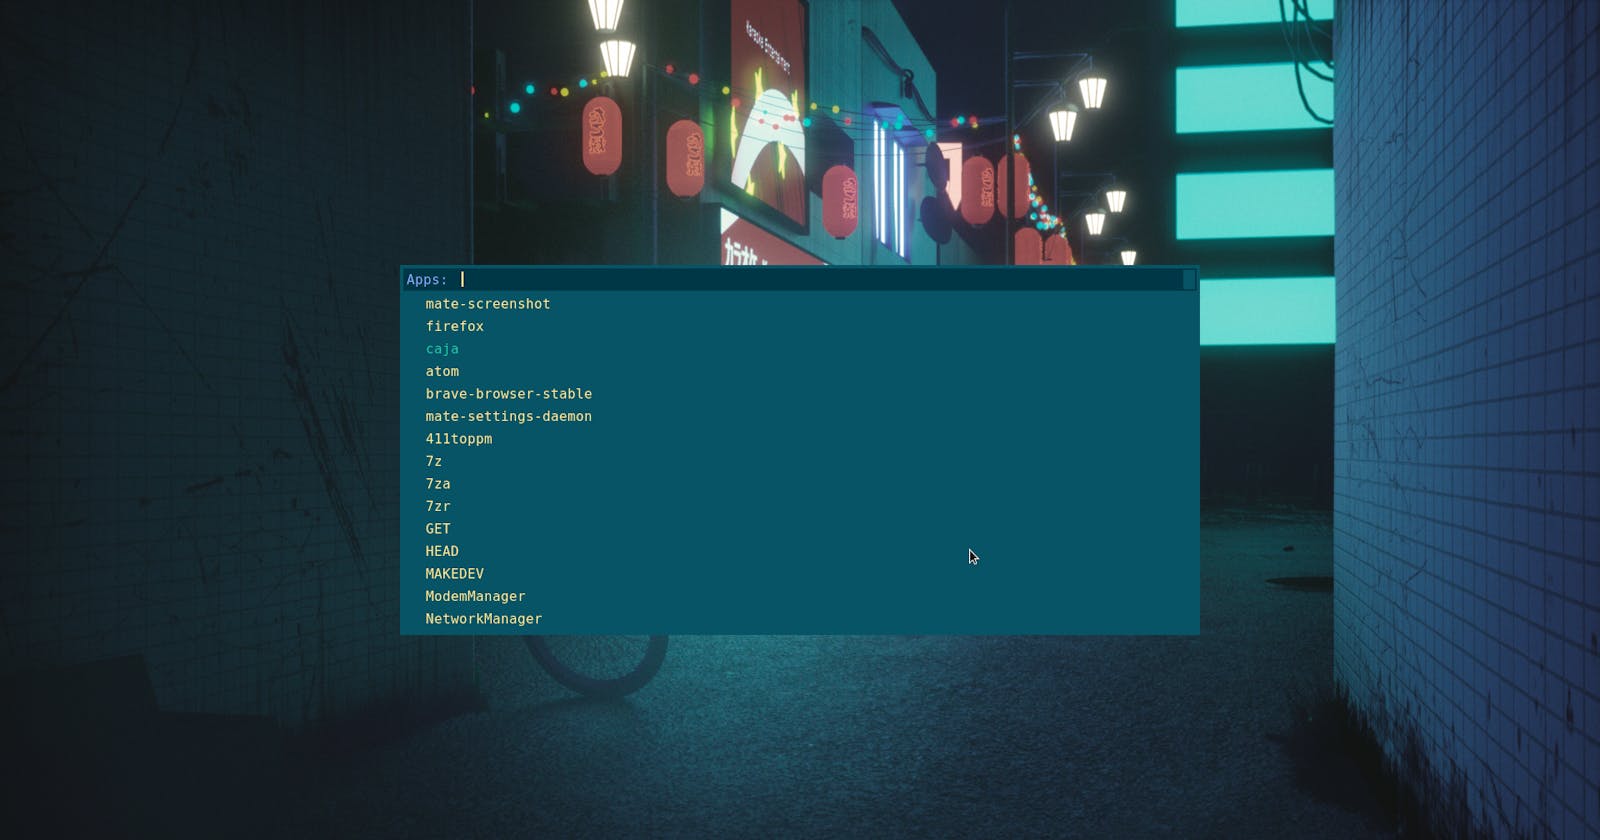
Depending on your requirement, Rofi can be used in either three of those modes. When Rofi is first installed, it will look like this by default
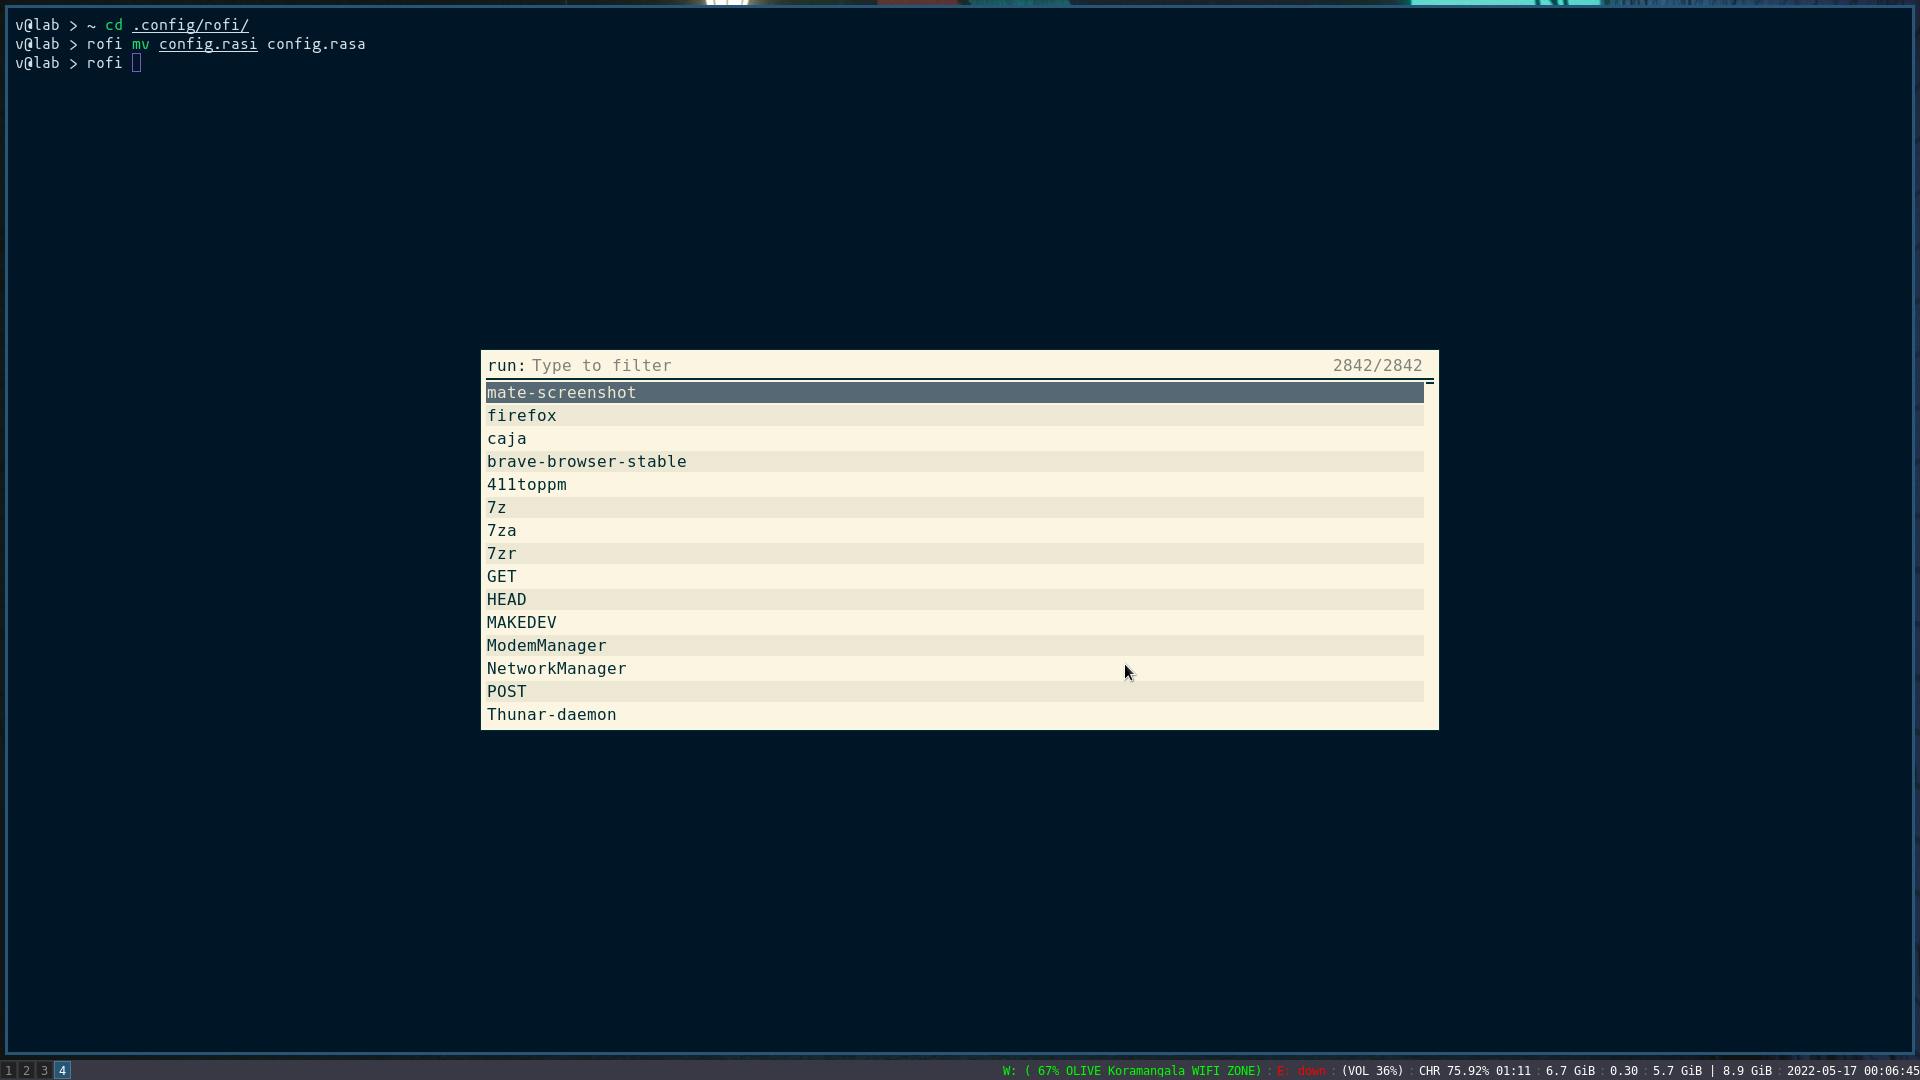 in comparison to a themed version
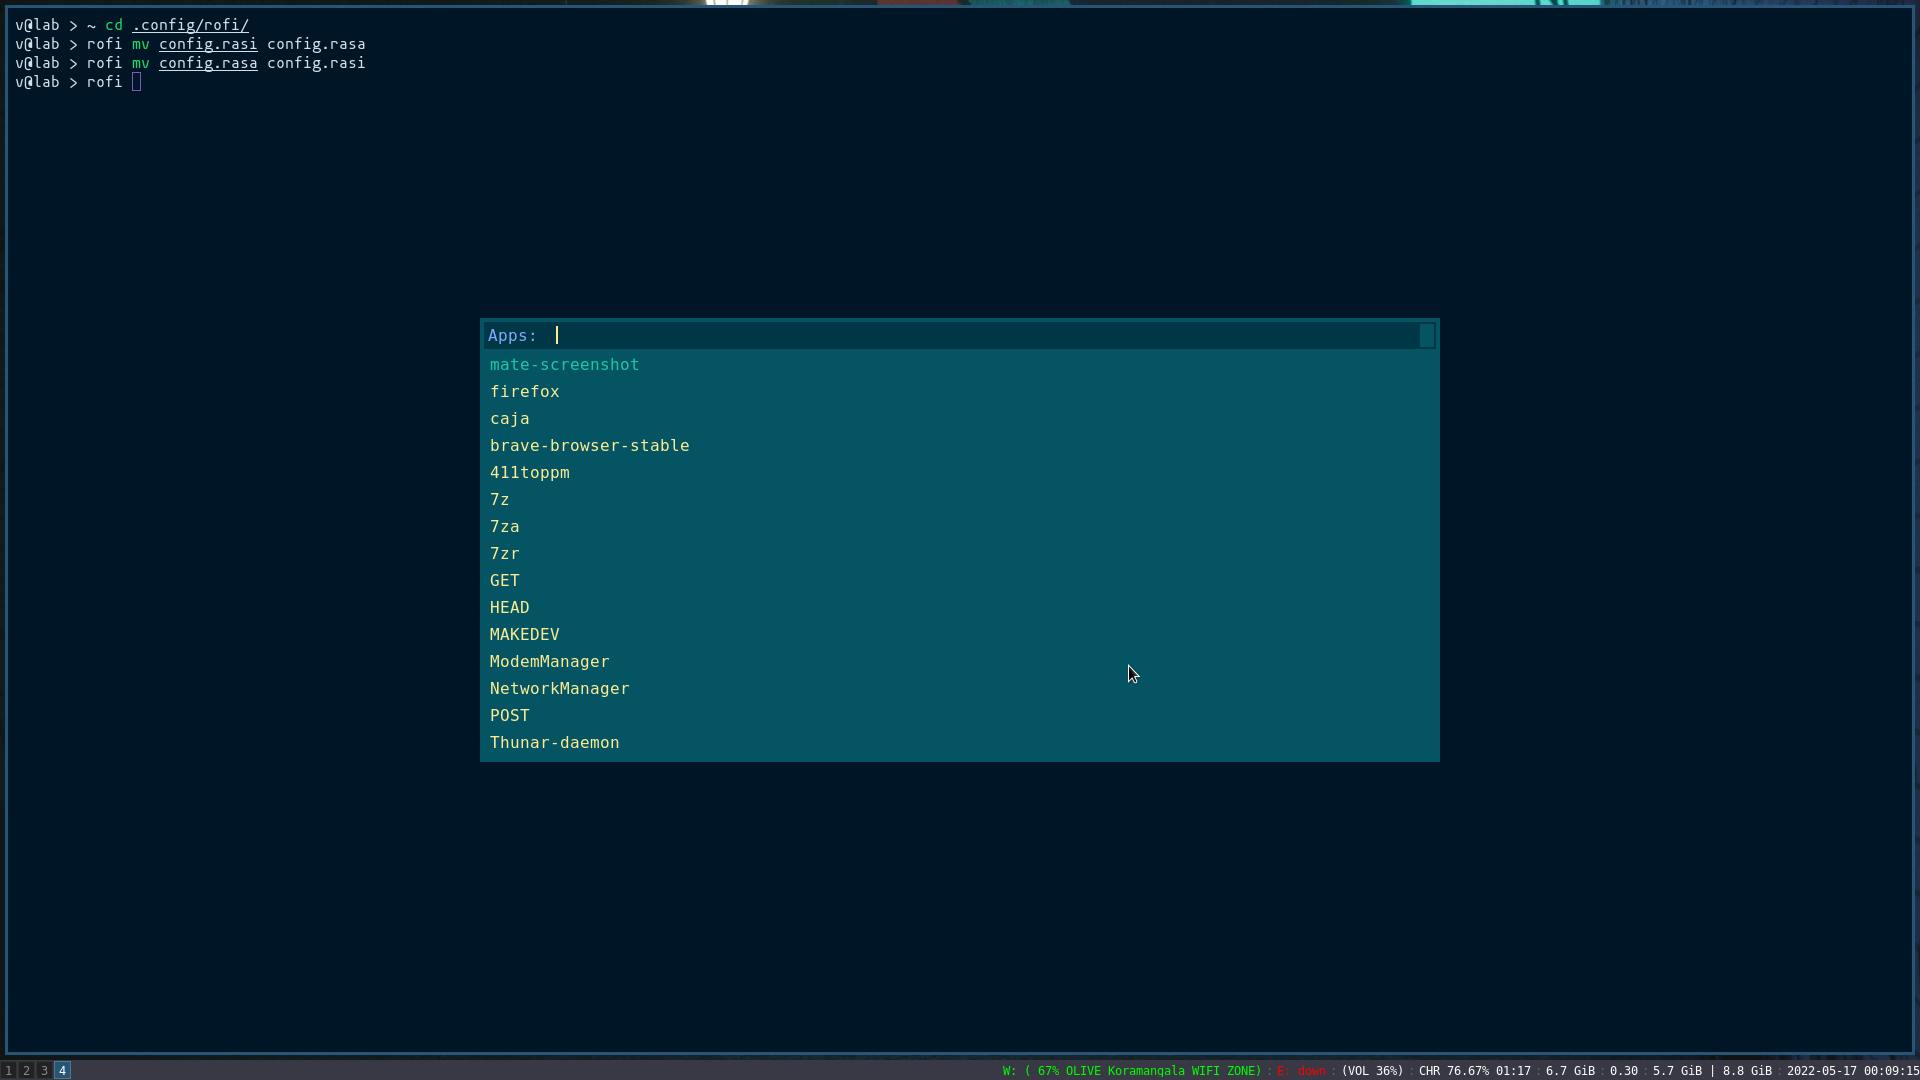 so let's see how to customize to have a more appealing appearance.
Configuration:
In order to do any sort of customization, you first need to create a config.rasi file. It is this file that will reflect all the changes that are made in customization.
{
 display-run: "Apps: "
}
@theme "/dev/null/"
 *{
   bg: #065465;
   fg: #d6deeb;
   bg-alt: #003747;

   background-color: @bg;
   foreground-color: @fg;
   text-color: #ffeb95;

   border: 0;
   margin: 0;
   padding: 2;
   spacing: 0;
 }
In the block of code displayed above, configuration is the section where all the preferred setting are saved. For example, in case you prefer to change what is displayed in the prompt of the respective mode, we can do this
configuration
{
  display-<mode>:"<Prompt>: "
}
where Prompt signifies what prompt you would like to display and mode signifies the mode in which the prompt should be displayed. Beyond this , it is possible to change the font style, show icons, and customize the format as well with there configurations.
configuration
{
 <mode>-display-format: "{icons} {name}";
 font: "<font of you're preference>";
 icon-theme: "<theme of your preference>";
 drun-display-format: "{icon} {name}";
 show-icon: true;
}
If you wish to see a more detailed documentation of the configuration section, paste the following command into the terminal
touch config.rasi
rofi -dump-config > config.rasi
This command will input all the possible configuration settings of rofi into the configuration file, which you can explore in greater detail. Moving on, lets get to the theming part of this article !!
Theming
If you may have noticed in the previous section where I had uploaded part of my theme, there is a section with the theme keyword. It is in this section that the background and foreground colours, the alternative colors, text colors, margins, padding, etc reside. We can assign the colours to the aspects of Rofi in here.
@theme "/dev/null/"
*{
   bg: #065465;
   fg: #d6deeb;
   bg-alt: #003747;

   background-color: @bg;
   foreground-color: @fg;
   text-color: #ffeb95;

   border: 0;
   margin: 0;
   padding: 2;
   spacing: 0;
 }
The theme keyword signifies the path to the file Rofi requires in order to implement the theme. While it is recommended to keep the theme data separate from the rest of the configuration to reduce file complexity, both data can exist within the same file. To keep the theme data within the config.rasi file, the path must be set as "/dev/null", else the default theme will bleed into the user set theme.
Once the colours and other variables are set, the next step is to assign those colours to the respective parts of the of Rofi
element selected {
  text-color: #21c7a8;
}
Here, element selected means the suggestion selected when searching for a program Input bar is the contains the prompt and entry bar at the top of the Rofi
inputbar
{
 background-color: @bg-alt;
 spacing: 2;
}
Within the input bar, I have assigned the text-color of the prompt and input box as given below
prompt
{
 background-color: @bg-alt;
 text-color: #82aaff;
}
entry
{
 background-color: @bg-alt;
 text-color: #ffeb95;
}
Other than the input bar, the background colour of the main box can set like so
mainbox
{
  background-color: @bg;
}
These are all the configuration and customization settings that I have assigned for the different parts of Rofi. As with the configuration, you can also get a detailed list of the different customization options available using the command mentioned below
rofi -dump-theme
You can use the output of the command to go into even greater detail with the customization if you prefer to.
There is also a diagram within the man pages of rofi-theme that helps as a guide in theming the different parts.
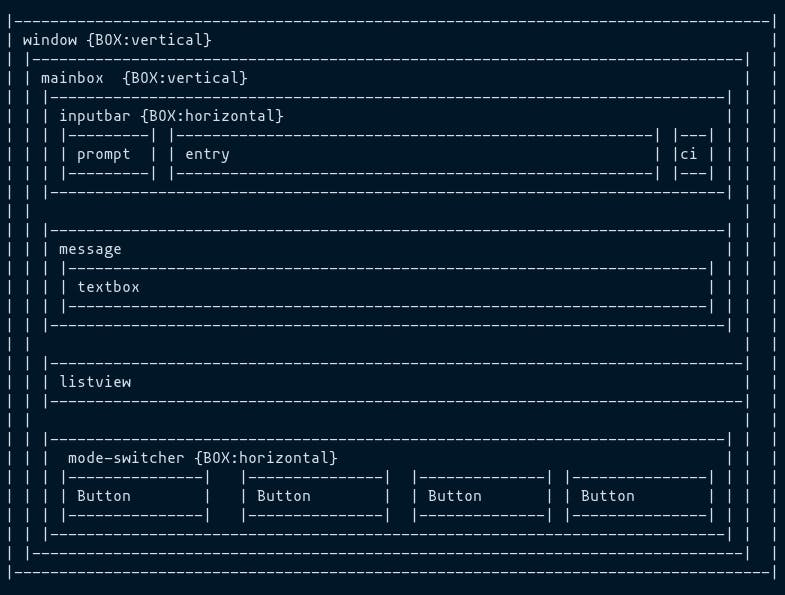
This sums up the basic of how to configure and customize Rofi as you require. I hope whomever comes across this article finds it helpful… Happy Theming !!!
