


Table of contents
In the previous article, i had discussed how to set up a basic Neovim configuration using Lua. In case you had missed it here is the link. In this article, I will be discussing my setup of Neovim using Tree-sitter for syntax highlighting and nvim-cmp and lsp-config for code completion.
Tree-sitter:
In order to explain tree-sitter, let's explore what a parser and parser generator is.
A parser is a tool that takes in input (usually text), and build a data structure, giving structural representation of the input while checking for correct syntax. In simpler terms, it identifies whether text inputted belongs to a specific language.
A parser generator is a tool that takes input as grammar and can automatically generate source code that can parse streams of characters using the grammar.
The tree-sitter plugin is a parser-generator tool and an incremental library. This means that it can create a syntax tree for a source code and efficiently update the syntax tree as the source code is being edited. It can display warnings and syntax error for source code being edited in real-time.
In order to install tree-sitter, first go to the treesitter github repo, and scroll to the installation section.
Plug 'nvim-treesitter/nvim-treesitter', {'do': ':TSUpdate'}
Then copy the command for installing the the plugin into the packages.lua in the nvim directory
 use
      {
          'nvim-treesitter/nvim-treesitter',
       }
Once those steps are completed, use the following command to install the plugin
:PackerSync
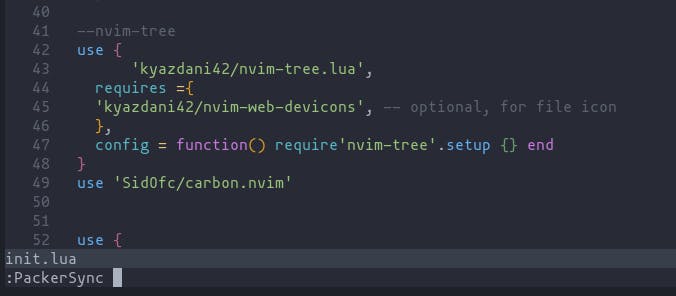
So far we have installed the plugin to using the lua package manager. However, it is not yet configured. In order to do so, we need to create a configuration lua file within the packages folder and add these lines of code to it
require(nvim-treesitter.configs).setup
{
   -- add languages required within the curly braces
  ensure_installed = { "c", "lua", "rust" },

  -- Install parsers synchronously (only applied to `ensure_installed`)
  sync_install = false,

  -- List of parsers to ignore installing (for "all")
  ignore_install = { "javascript" },

  highlight = {
    -- `false` will disable the whole extension
    enable = true,

    -- NOTE: these are the names of the parsers and not the filetype. (for example if you want to
    -- disable highlighting for the `tex` filetype, you need to include `latex` in this list as this is
    -- the name of the parser)
    -- list of language that will be disabled
    disable = { "c", "rust" },

    -- Setting this to true will run `:h syntax` and tree-sitter at the same time.
    -- Set this to `true` if you depend on 'syntax' being enabled (like for indentation).
    -- Using this option may slow down your editor, and you may see some duplicate highlights.
    -- Instead of true it can also be a list of languages
    additional_vim_regex_highlighting = false,
  },
}
Once these steps are completed, refresh neovim using the source command
:source %
to apply the changes.
LSP
Language Server Protocol, a.k.a LSP allows us to use features such as autocompletion, go-to definition, or documentation on hover for a programming language. It allows us to implement Visual Studio Code like auto-completion in Neovim.
In order to set up LSP, we first need to install the lsp-config plugin from here as well as an nvim-lsp-installer (installation instructions are provided in the github page). Having installed the plugins, a lua file for the lsp-installer plugin needs to be created within the packages directory and the following lines of code added to it.
local lsp_installer = require("nvim-lsp-installer")

-- Register a handler that will be called for each installed server when it's ready (i.e. when installation is finished
-- or if the server is already installed).
lsp_installer.on_server_ready(function(server)
    local opts = {}

    -- (optional) Customize the options passed to the server
    -- if server.name == "tsserver" then
    --     opts.root_dir = function() ... end
    -- end

    -- This setup() function will take the provided server configuration and decorate it with the necessary properties
    -- before passing it onwards to lspconfig.
    -- Refer to https://github.com/neovim/nvim-lspconfig/blob/master/doc/server_configurations.md
    server:setup(opts)
end)
In order to download an LSP server, the command is used
:LspInstall <server_name>
While we have the necessary plugins for LSP installed, an additional plugin is required to enable the auto-completion.
Completion Engine
In order to enable the completion feature, a completion engine such as nvim-cmp is utilized. In order to install nvim-cmp, first go to the github page and install the first 6 plugins. Once completed, we can choose the snippet engine of our preference, from the ones given there.
After having installed the snippet engine, the configurations required for nvim-cmp needs to be copied and pasted in the configuration lua file created for nvim-cmp.
call plug#begin(s:plug_dir)
Plug 'neovim/nvim-lspconfig'
Plug 'hrsh7th/cmp-nvim-lsp'
Plug 'hrsh7th/cmp-buffer'
Plug 'hrsh7th/cmp-path'
Plug 'hrsh7th/cmp-cmdline'
Plug 'hrsh7th/nvim-cmp' -- all the plugins in this group are mandatory

" For vsnip users.
Plug 'hrsh7th/cmp-vsnip'
Plug 'hrsh7th/vim-vsnip'

" For luasnip users.
" Plug 'L3MON4D3/LuaSnip'
" Plug 'saadparwaiz1/cmp_luasnip'

" For ultisnips users.
" Plug 'SirVer/ultisnips'
" Plug 'quangnguyen30192/cmp-nvim-ultisnips'

" For snippy users.
" Plug 'dcampos/nvim-snippy'
" Plug 'dcampos/cmp-snippy'

call plug#end()

set completeopt=menu,menuone,noselect

lua <<EOF
  -- Setup nvim-cmp.
  local cmp = require'cmp'

  cmp.setup({
    snippet = {
      -- REQUIRED - you must specify a snippet engine
      expand = function(args)
        vim.fn["vsnip#anonymous"](args.body) -- For `vsnip` users.
        -- require('luasnip').lsp_expand(args.body) -- For `luasnip` users.
        -- require('snippy').expand_snippet(args.body) -- For `snippy` users.
        -- vim.fn["UltiSnips#Anon"](args.body) -- For `ultisnips` users.
      end,
    },
    window = {
      -- completion = cmp.config.window.bordered(),
      -- documentation = cmp.config.window.bordered(),
    },
    mapping = cmp.mapping.preset.insert({
      ['<C-b>'] = cmp.mapping.scroll_docs(-4),
      ['<C-f>'] = cmp.mapping.scroll_docs(4),
      ['<C-Space>'] = cmp.mapping.complete(),
      ['<C-e>'] = cmp.mapping.abort(),
      ['<CR>'] = cmp.mapping.confirm({ select = true }), -- Accept currently selected item. Set `select` to `false` to only confirm explicitly selected items.
    }),
    sources = cmp.config.sources({
      { name = 'nvim_lsp' },
      { name = 'vsnip' }, -- For vsnip users.
      -- { name = 'luasnip' }, -- For luasnip users.
      -- { name = 'ultisnips' }, -- For ultisnips users.
      -- { name = 'snippy' }, -- For snippy users.
    }, {
      { name = 'buffer' },
    })
  })

  -- Set configuration for specific filetype.
  cmp.setup.filetype('gitcommit', {
    sources = cmp.config.sources({
      { name = 'cmp_git' }, -- You can specify the `cmp_git` source if you were installed it.
    }, {
      { name = 'buffer' },
    })
  })

  -- Use buffer source for `/` (if you enabled `native_menu`, this won't work anymore).
  cmp.setup.cmdline('/', {
    mapping = cmp.mapping.preset.cmdline(),
    sources = {
      { name = 'buffer' }
    }
  })

  -- Use cmdline & path source for ':' (if you enabled `native_menu`, this won't work anymore).
  cmp.setup.cmdline(':', {
    mapping = cmp.mapping.preset.cmdline(),
    sources = cmp.config.sources({
      { name = 'path' }
    }, {
      { name = 'cmdline' }
    })
  })

  -- Setup lspconfig.
  local capabilities = require('cmp_nvim_lsp').update_capabilities(vim.lsp.protocol.make_client_capabilities())
  -- Replace <YOUR_LSP_SERVER> with each lsp server you've enabled.
  require('lspconfig')['<YOUR_LSP_SERVER>'].setup {
    capabilities = capabilities
  }
EOF
In addition to the snippet engine that you may have installed, if you prefer, you can also install an additional snippet engine called friendly snippets,
use "rafamadriz/friendly-snippets"
and add the following line into the nvim-cmp configuration file in order to activate the snippet
require'luasnip'.filetype_extend("ruby", {"rails"})
After having installed and configured all the plugins, you may notice that text completion is not working. This is mostly due to a setting that is preconfigured within the language servers. In thisgithub page, is a list of supported language servers and their default configurations.
If you examine the default configurations for each of the servers, you will notice a section called root_dir for all the servers.
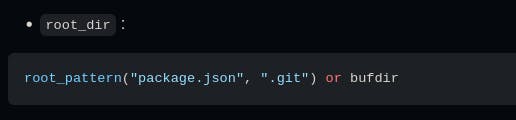
In order to autostart the completion feature when opening neovim in a folder, the project needs to have a root directory that can be recognized by neovim. Any one of the required root directories are needed in order to autostart the server (usually .git).
This covers the basic setup to enable parsing and auto-completion for Neovim. I hope whomever reads this will find the article useful.